

How can you pluck a lace wig by yourself?
Nov 02, 2023
Are you a wig beginner? And do you know how to create a natural look by yourself at home?

However, for beginners, creating a natural look is not an easy thing. Among the plethora of options available, one of the most popular choices is the pre-plucked lace wig which is widely used by people and well-known for achieving a natural look. All wigs on Sogoodhair are pre-plucked, most pre-plucked lace wigs have thin hairlines, giving the impression of your natural hairline. So as a beginner, you just need to simply install it.
However, how can you pluck a lace wig by yourself when you get a unplucked wig? Let’s study them through this blog.

Why we Need Pluck A Lace Wig?
Pre-plucked wigs let you achieve a natural-looking hairline. In a plucked wig, the density on the top is lower, as is the case with real hair. Hair of unequal length always tends to grow around a person’s hairline, which is a sign of natural hair growth.
Thus, if you need to get a completely realistic look, the wig should also be plucked to give that same impression and create a flawless hairline. Pre-plucked wigs do not have this problem.
However, for a wig that is not pre-plucked, you have to perform plucking on the wig manually. So follow this blog, it can teach you how you can pluck a lace wig by yourself step by step.
HOW to PLUCK A LACE WIG BY YOURSELF?
If you do not have the pre-plucked wig, the following are some simple customization steps that can help you achieve your desired natural look.
Things You’ll need:
Wig stand; Butterfly clips; Tweezers; Comb
Step 1: Start With Dry Hair
Start pluck TF out of your lace frontal when it is dry so that's something different because some people had to do wet punches all the time. Why? Plucking the hair dry is easier to gauge the frontal fullness and density. It's easier to see where you need and don't need to pluck.
Step 2: Fix Your Wig On Canvas Head
Put the canvas head on a stand, then pin down your wig on the canvas head and get it ready for plucking hairline, making sure that the head lace is laying flush tightly on your way.
Step 3: Plucking Hairline In Sections
Start to pluck hairline by sections, why? It is the starting base for creating the naturalistic hairline. Working in sections works better as a guide than working blind and plucking with no structure. Usually we choose to start pluck from the side.
Step 4: Take Out First Light Part of The Hair To Start
Use Tail Comb to take out a small strand of hair along the hairline (right behind the hairline), like a very thin layer of the hair (usually mimics the baby hairs). Then comb the remaining hair back.
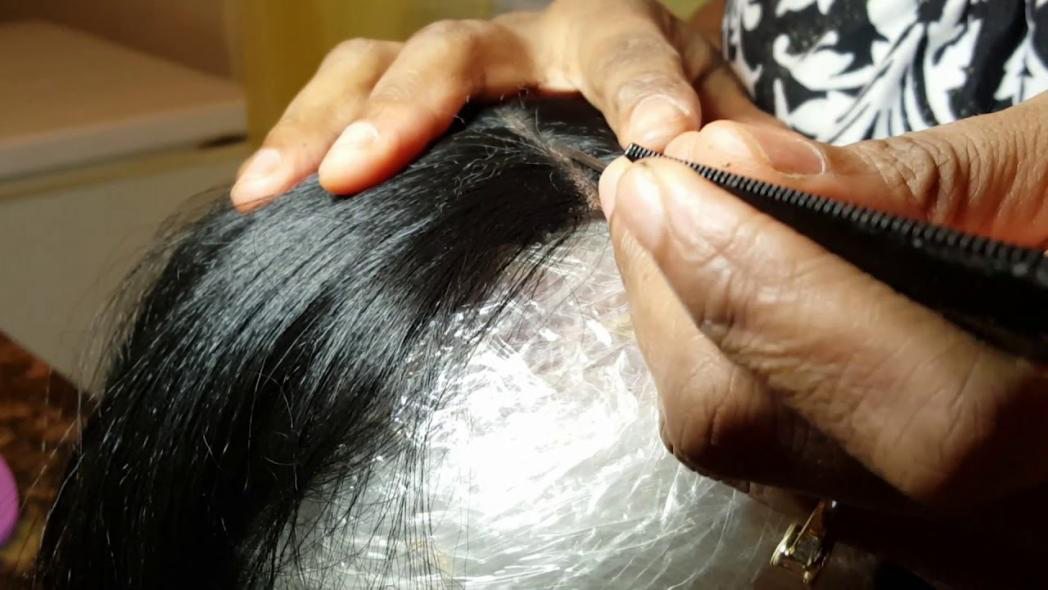
Step 5: Use Tweezers To Pluck Hairline
Before plucking, you can spry some water to the hairline also you can do it with dry hair. Take the lower side of the tweezers to pluck sporadically throughout the lace, because the lower side is more delicate and it doesn’t pull as many hairs out as the point of your size. Making sure you are always plucking in moving sections. Tweeze at the actual front of the hairline to fade out like a sporadic as possible so that it could have a gradient effect, you surely don’t want the hairline to start thick because it won’t look realistic.

Step 6: Take Another Parts of Hair & Go Ahead Plucking
Once you have done the first section, part a new layer out and just keep going back. We always have the option of coming back if we need it anymore. It’s best to do less than more when it comes to plucking your lace frontal because you can go back to do more and can not put the hair taken off back on the hairline if you did too much. Usually, plucking in 4-6 sections mimics the natural density of the hairline.
Step 7: Pluck At The Same Way On The Opposite Side
Once you finish the plucking on one side of your lace wig, go to do the same thing that you did on that side to the opposite side. Try out the wig several times to track your progress and see where you need to pluck some more, make sure you get the same hairline effect you have done for the first side.
Step 8: Pluck The Top Area of Your Lace Wig
Now move on to the top area of the wig, you will not have to do too much plucking on this area because the top part of your hair is intestine as your site. Also, you don’t need to pluck for sections here, and just need to puck a little, sometimes pull the hair back to see how it looks and if you think that the hairline is still too dense, go back and repeat these steps.
Step 9: Complete and Make Part
Stop plucking once you feel your wig have gotten a perfectly realistic plucked hairline that looks flawless. If you want to make a part for your wig on the middle or on the sides, plucking some of the hair after parting to make it look natural as well.

Tips:
When you don’t have a mannequin or wig stand: For some people, it may be hard, but it really is not. When you don’t have a mannequin available, pluck your wig directly on your head. The way to do it is to hold your lace with a tight grip, so you don’t over-pluck. For some people, it is a preferred way to do it because, with a wig on your head, you exactly know which direction you want your hairline to be.

Follow this blog, you can easy to pluck your wig at home by yourself. What’s more, for our wigs in Sogoodhair, the handtied hairline with transitional density when making the wig without the damage caused by the plucking process,so it is really friendly for the beginner.